Fashion
How to Clean and Refresh Your Short Braided Wigs

Short braided wigs are a fantastic way to switch up your look effortlessly, offering versatility, style, and convenience. These stunning braided wigs can be an excellent investment, but like any hairpiece, they require regular maintenance to keep them looking fresh and beautiful. Whether you wear your short braided wig daily or reserve it for special occasions, understanding how to clean and refresh it is essential for maintaining its longevity and appearance. In this guide, we’ll walk you through the steps to properly care for your short braided wigs, ensuring they remain a stunning addition to your style arsenal.
1. Preparing Your Wig for Cleaning
Before diving into the cleaning process, it’s crucial to prepare your wig properly. Start by gently detangling short braided wigs. This can be done using your fingers or a wide-tooth comb. Avoid using regular brushes, as they can cause frizz or loosen the braids. If your wig has any accessories like beads or ties, remove them carefully. Additionally, check for any signs of damage, such as loose threads or frayed braids, and address these before washing. Taking these preparatory steps ensures that your short braided wig is ready for a thorough cleaning without causing any unnecessary damage.
2. Washing Your Short Braided Wig
Washing your short braided wig is a delicate process, but it’s essential for keeping the wig fresh and free of dirt, oils, and product buildup. To start, fill a basin with lukewarm water and add a small amount of wig shampoo. Regular shampoos can be too harsh, so it’s best to use a product specifically designed for wigs. Submerge the wig in the water and let it soak for about 5-10 minutes, allowing the shampoo to work its way through the braids. Gently swish the wig in the water, but avoid rubbing or twisting it, as this can cause the braids to unravel or frizz.
3. Rinsing and Conditioning the Wig
After washing, it’s crucial to rinse your wig thoroughly to remove all shampoo residues. Drain the soapy water and refill the basin with clean, lukewarm water. Gently swish the wig in the water to rinse out the shampoo. Repeat this process if necessary until the water runs clear. Once rinsed, apply a wig-friendly conditioner to the braids. Conditioning helps to restore moisture to the synthetic fibers, making them soft and manageable. Let the conditioner sit for a few minutes, then rinse it out thoroughly. Be sure not to leave any conditioner in the wig, as this can attract dirt and dust over time.
4. Drying Your Wig Properly
Proper drying is essential to maintaining the shape and integrity of your short braided wig. After rinsing out the conditioner, gently squeeze out excess water from the wig. Avoid wringing or twisting the braids, as this can cause damage. Lay the wig flat on a clean towel and pat it dry. To help the drying process, you can roll the wig in the towel and gently press to remove additional moisture. Once most of the water is removed, place the wig on a wig stand or a mannequin head to air dry. This helps maintain the shape of the braids and prevents them from becoming flat or misshapen.
5. Rejuvenating the Braids
After your short braided wig is dry, it’s time to refresh the braids. Over time, the braids may lose some of their shine or develop frizz, especially if the wig has been worn frequently. To rejuvenate the braids, you can apply a light wig spray or a leave-in conditioner specifically designed for synthetic wigs. These products help restore shine and smooth down any frizz. Apply the product sparingly and run your fingers gently through the braids to distribute it evenly. If necessary, you can also use a steamer to refresh the braids, but be cautious with the heat to avoid damaging the synthetic fibers.
6. Storing Your Wig Correctly
Proper storage is crucial for maintaining the longevity and appearance of your short braided wig. When you’re not wearing the wig, store it on a wig stand or mannequin head to preserve the shape of the braids. Avoid storing your wig in direct sunlight or in areas with high humidity, as this can cause the fibers to weaken or fade. If you’re traveling, use a wig bag or a soft cloth to protect the wig from dust and tangling. Proper storage not only keeps your stunning braided wigs looking its best but also ensures it’s ready to wear whenever you need it.
7. Touch-Ups Between Washes
While regular washing is essential, sometimes your short braided wig just needs a quick refresh between washes. For minor touch-ups, use a dry shampoo spray designed for wigs. This can help absorb excess oils and remove odors without the need for a full wash. Lightly mist the spray onto the braids, then gently pat them with a clean cloth to remove any residue. Additionally, if the ends of the braids start to fray or look worn, you can carefully trim them with a pair of sharp scissors. These simple touch-ups can extend the time between washes and keep your wig looking fresh.
8. Regular Maintenance Tips
In addition to cleaning and storing your wig properly, regular maintenance is key to keeping your short braided wig in top condition. Avoid using heavy styling products, as they can build up and make the braids look greasy or weighed down. When wearing the wig, try to avoid excessive pulling or tugging on the braids, as this can cause them to loosen over time. If you notice any frizz or loose hairs, use a small amount of mousse or styling gel to smooth them down. Regularly check the wig for any signs of wear and address any issues promptly to prevent further damage.
Maintaining your short braided wigs is an essential part of ensuring they remain stunning and ready to wear for any occasion. By following these steps, you can keep your wig looking fresh, clean, and beautiful for longer periods. Proper cleaning, drying, and storage, along with regular touch-ups and maintenance, are all crucial elements in preserving the quality and appearance of your braided wig. With the right care, your short braided wig will continue to be a versatile and stylish addition to your wardrobe, allowing you to express your unique style with confidence and ease.
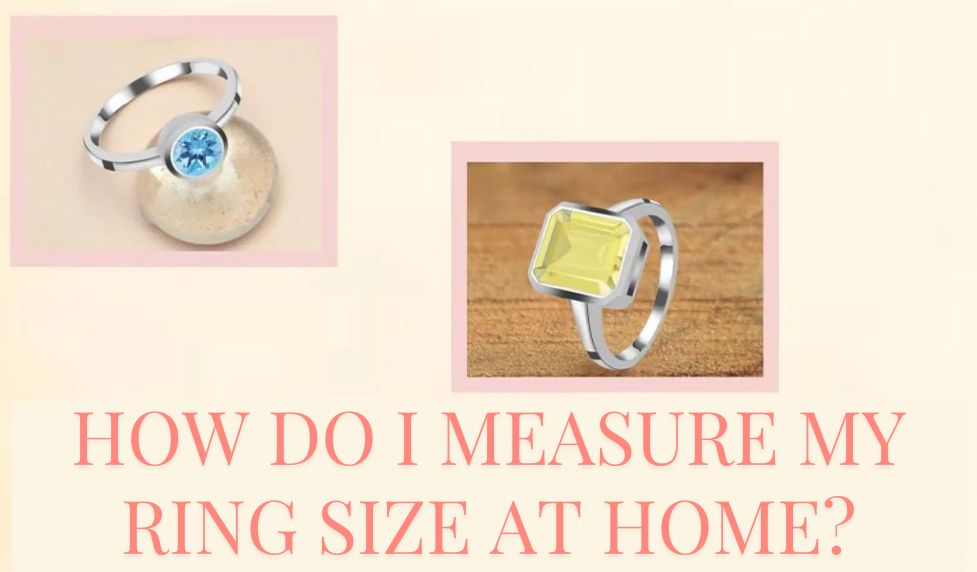
Ring sizes can be perplexing, particularly when there are regional assortments in assessment systems. It is vital for know how to change over ring sizes across different structures, whether you are shopping on the web or purchasing a ring as a present for someone in a substitute country. You will find a supportive ring size chart in this educational activity, which will in like manner help you in exploring the snares of ring size understanding.
Figuring out Structures of Ring Size Assessment
If you’re interested about the assessment structures required by different nations and areas for ring sizes, picking the right fit may be inconvenient. The most often used systems are:
US and Canada: Ring sizes going from size 0 to size 16 and past are assessed including a numerical scale in the US and Canadian systems. The figures address the internal limit of the ring in either millimeters or inches.
UK, Australia, and Ireland: In these three countries, ring sizes are tended to by letters, going from beginning to end, with additional letters (like A½ or B½) appointing half sizes. The millimeter-assessed internal framework of the ring connects with the sizes.
Europe: Yet the numbers are exceptional, European nations use a numerical structure like that of the US. The sizes, which vary from 40 to, not altogether settled by measuring the ring’s internal width in millimeters.
Japan, China, and South America: South America, China, and Japan all use undeniable numbers in a numerical structure that is like that of the US and Europe. Japanese ring sizes are 1 through 27, which depend inside limit of the ring in millimeters.
Switzerland: The European and American systems are merged to make an undeniable structure that is used in Switzerland. Like the European system, but with half sizes, the sizes range from 41 to 76, which looks at to the ring’s inward broadness in millimeters.
ISO Standard: ISO 8653:2016, a ring size standard, was made by the Overall Relationship for Standardization (ISO) and is generally utilized in Europe and two or three unique nations. Like the European system, the ISO procedure relies upon the inside expansiveness of the ring assessed in millimeters.
Also Read: Birthstone Jewelry and Its Symbolic Significance.
Why Ring Size Conversion Matters
Changing over ring sizes is critical because of multiple factors:
Overall Retailers: As web business has created, clients are dynamically purchasing rings from abroad associations. Despite where the ring is coming from, knowing how to change over ring sizes across different structures can guarantee that you get the authentic fit.
Present-giving: Understanding how to change over ring sizes will save you the trouble of returning or resizing rings that you’re purchasing as presents for people in different countries.
Customization: A lot of diamond experts uncommonly make rings. You ought to enter the right size in the jewel expert’s structure if you are ordering a custom ring from them and they use an other assessment system.
Resizing: A diamond expert could need to resize a ring you own if it doesn’t fit precisely. It will go even more effectively if you know the right size in your nation’s circumstance.
How to Convert Ring Sizes
At the point when you know the basics, changing over ring sizes between various assessment structures is simple. Knowing the ring’s inner blueprint, or distance across, in millimeters — which is the typical figure most structures — is crucial. To change over ring sizes between the most often used systems, follow these methods:
UK/Australia/Ireland to US/Canada:
To get a similar letter size in the UK system considering your US/Canada numerical size, use a change chart.
Europe to the US/Canada:
Considering your US/Canada size’s internal border, find the matching European size.
US/Canada to South America, China, Japan:
Using a change chart, match the US/Canada size to a similar Japanese size.
UK, Australia, Ireland to the US and Canada:
Using a chart, convert the UK letter size to similar numerical size for the US and Canada.
Ireland, Australia, and the UK to Europe:
Using a change chart, convert the UK letter size to a similar European size.
Europe to the US and Canada:
Using a change chart, find similar US/Canada size for each European size.
Europe to Ireland, the UK, and Australia:
Using a chart, convert the European size to a similar UK letter size.
US/Canada to Japan/China/South America:
Using a chart, convert the Japanese size to similar US/Canada size.
South America, China, Japan, and Europe:
Using a change chart, choose a similar European size considering the Japanese size.
Switzerland Relating to Various Frameworks:
Using an understanding chart, convert the Swiss size to similar US, UK, or European size.
Using a Ring Size Chart
A key resource for changing over ring sizes between various systems is a ring size chart. The chart normally shows the expansiveness and internal fringe in millimeters as well as the same sizes in different systems. The best technique to use a ring size chart is according to the accompanying:
Figure the edge or internal estimation:
Measure the inner width or blueprint of a ring that fits you well using a caliper or ruler.
Choose the Matching Angle:
Find the ring size that thinks about to your assessment on the chart and the system you are changing over totally to.
Affirm Your Change Again:
Use the chart to actually look at the precision of your change. Use a solid chart, as some have half sizes or contrasts between systems.
Examine Hiring a Specialist:
See a pearl expert if you’re unsure about your assessments or change. They can absolutely conclude your ring size and suggestion change appeal.
Tips for Accurate Ring Sizing
The Fitting Time of Day to Evaluate:
It’s ideal to evaluate your ring size around evening time when your fingers are at their most noteworthy in light of the fact that fingers could develop throughout the day.
Contemplate Temperature:
In colder months, fingers could contract, while in more sultry months, they could create. Consider the temperature while concluding your ring size.
Use the Reasonable Stuff:
More careful assessments can be gotten with a ring measuring gadget or a downloadable ring size guide than using a string or ruler.
Examine Ring Width:
Your finger could feel all the more close while wearing greater rings. Consider ordering a half size greater if you’re purchasing a wide band.
Search for Expert Assistance:
See a pearl vendor in case you don’t know about your ring size. They can authoritatively gauge your finger and give you the fitting size in different systems.
Conclusion
It’s pressing to know how to change over ring sizes between various measuring structures while shopping abroad, giving gifts, and re-trying things. Notwithstanding where you are in the world, you ought to have confidence that you find the best fit by using a ring size chart and the direction gave in this book. Knowing your ring’s interior border or expansiveness and using a trustworthy change chart to conclude the matching size are essential while changing over between the US, UK, European, or Japanese systems. With this getting it, you’ll have the choice to orchestrate the challenges of ring measuring and find the best ring for every situation actually.
Read More: Clearskyhaven.com


Content Writing Services: Unlocking the Best SEO Services for Your Business

BuyBarcode’s Retail Billing Software: Transforming Retail Business Management

Ideas on How to Design a Customized Happy Birthday Card

Expotab.com Login: How to Access Your Account Easily

Wellhealthorganic’s Guide to Skin Care in Hindi: Tips and Tricks for Healthy Skin

Flower Shop in Ottawa: Your Guide to Local Florists and Delivery Services
-
 Tech11 months ago
Expotab.com Login: How to Access Your Account Easily
-
 Health11 months ago
Wellhealthorganic’s Guide to Skin Care in Hindi: Tips and Tricks for Healthy Skin
-
 Business11 months ago
Flower Shop in Ottawa: Your Guide to Local Florists and Delivery Services
-

 Tech11 months ago
Acumatica Software: Streamline Your Business Operations
-
Health8 months ago
Ask People You Know And Trust To Avoid Asthma In September
-

 Health11 months ago
WellHealthOrganic Buffalo Milk Tag: What You Need to Know
-

 Home & Garden11 months ago
Mississauga Handyman Services: Your Go-To Solution for Home Repairs
-

 Business10 months ago
Second Mortgage Toronto: How to Get the Best Rates and Terms